|
|
Building an online store is
much easier than what most people think. And you
can build a very nice website using a simple
website design program such as CoffeeCup HTML
Editor, Microsoft Expression Web, Adobe
Dreamweaver, GoLive and others as well.
Furthermore, learning how to use such programs
is as simple as reading the step-by-step
tutorials and then putting them into practice.
If you can read and type, then you can build
your own online store.
And the first thing you’ll need to do is to
choose a web host provider to host your website
such as JustHost, iPage, Godaddy.com or others
as well. |
|
|
|
| |
Then you can register your
domain name with that same web host provider for
as little as $10 per year and get your website
hosted for as little as $4 per month with
shopping cart included. After registering your domain name and obtaining
a web hosting account, then you can proceed to
build your online store with your web
development program.
For example, when using Microsoft Expression
Web, you would have to first open up the
Expression Web program on your screen.
Then click >"Open site"
Then type in your domain name in the dialog box
provided: http://www.yournewonlinestore.com
Then enter your user name and password for your
web hosting account when prompted to do so.
An index of pages for your website will appear
in the Expression Web file window.
Click on the page (file) called “index”, which
is the main page for your website.
The index page may already have some promotional
content or a welcome logo in place.
Simply select and highlight everything on that
page and then delete it in order to start
building from scratch.
It’s also best to leave the background of the
webpage white as a white background is standard
in ecommerce design and is more effective as
well.
Then you can begin to add tables, rows and
columns and insert images and product
informational text within those tables.
Tables consist of rows which run across the web
page and columns which run up and down the page.
And these tables, rows and columns are what keep
all of your images and product information in
place. |
| |
| |
To
begin to insert tables:
Click on "Table" from the top menu in
Microsoft Expression Web
Then select 6 rows and 3 columns and
then click “ok” or “apply”. (NOTE: 6
rows and 3 columns are used for
illustrational purposes only. You can
add more rows and more columns as well.)
|
 |
|
Your logo, header and top navigation menu will
be placed in the top 2 to 3 rows.
There should be a slight margin on both sides of
the page as well.
Then click, grab and stretch your left column
line to the left of the page in order to give
you a 2 inch margin on the left side of the
webpage. This is where you will be placing your
left navigation menu which will appear on each
and every page.
You can fit more text or page buttons on a
vertical navigation menu than you can on a
horizontal navigation menu. And that left
navigation menu, which can consist of text or
buttons, will take your customers to every
important page on your website.
You will also want to have a 1 inch margin on
the right side of the webpage as well in order
to separate product images and information from
the right side of the page wall.
Margins on both sides of the page are necessary
in order to keep product images and information
in the center of the page.
Then starting from the top of the page, insert
your logo on the upper left hand corner of the
webpage, (within the first or second row). (You
may want to leave some space on the top row in
order to have a small margin on the top of the
page as well.) |
| |
|
|
To insert your
logo onto the upper left hand corner of
the webpage:
1. Click your
mouse on the top left table row
2. Click Insert
from the top menu
3. Then click >
Picture > From file
Find the logo
image on your hard drive and then click
“Insert”. |
 |
|
| |
| |
Now you have your logo in
place on the top left hand corner of the
webpage.
Next, insert your top navigation menu, under the
logo, in the same manner in which you inserted
your logo, (if your top navigation menu is one
main image). |
| |
| |
Your top navigation menu can also be
made of regular text links as well,
which works well for search engine
optimization.
Then you would highlight those text
links on the menu and then link those
text titles to their respective web
pages on your website when those pages
are finally built and completed. |
 |
|
If your top navigation menu
is a series of text or image buttons then type
the text or insert the buttons in the rows and
then link those text and/or buttons to the
proper web pages on your website.
You can also add a background color inside the
row of where your navigation menu would be and
then enter your text on that row to create a
text and image free navigation menu which
downloads quickly.
To add a background color to any specific row,
simply click inside the cell with your mouse and
then click “Cell properties”.
Select the “Background” option and then choose a
color for the background from the color palette
provided or insert a background image within
that cell area.
Then click “Apply”
Then again, you can type the page text titles
and link those text titles to their web pages by
highlighting the text, selecting “Hyperlink”,
and click on the page you want that text to
point to from the open dialog box. Then click
“OK”. |
| |
| |
Then you can proceed to add
and/or insert your left navigation menu as well
in the same manner in which you inserted the top
menu, linking those text titles or page buttons
to those specific pages within your website,
(once those pages are built).
NOTE: Examples of designs and layouts can be
seen on TemplateMonster.com in the ecommerce
categories. |
| |
| |
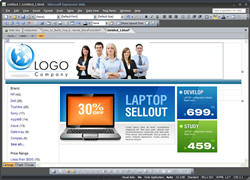
Then in the center (body) of the
webpage, and underneath that top
navigation menu, you can add 3 to 6 or
more of your most popular products,
latest products, or both.
The main page on your website should be
the equivalent of your showroom and
should be used to display your new and
best selling products and most popular
products as well. |
 |
|
You can also display an
image of your best selling categories and
subcategories on that same main page.
And you can add more products on your main page
by simply adding more tables, rows and columns
and then inserting those products into those
rows and columns.
After inserting your logo, top menu, side menu
and product images into the body of the webpage
then your main page is done.
Click “Save” and you’re finished.
Saving the page will automatically upload and
publish that web page onto the internet. And now
that page is live for the whole world to see.
Furthermore, this page becomes your template for
the rest of your web pages as well. And you can
use that same page over and over again by simply
removing the product images and text and then
inserting the new product image and the new
product information and then click save as “new
product name”.
Then at the bottom of the page, or throughout
the webpage as well, you can add the “Buy now”
or “Add to cart” button for your customers to
click on when they’re ready to buy the product. |
| |
| |
Then link that buy button to that
product in your shopping cart data base.
Save page as “new product name” and
you’re done.
Then continue to build the rest of your
pages in the same manner until your
website is done and complete. |
 |
|
| |
| |
|
|
| |
|
<-Back - Main Page -
Next-> |
| |
| >
How to Build Effective Product WebPages |
| >
Building Your eStore with Website Templates |
| >
Designing, Planning and Organizing Your eStore |
| >
Implementing Graphic Elements |
| |